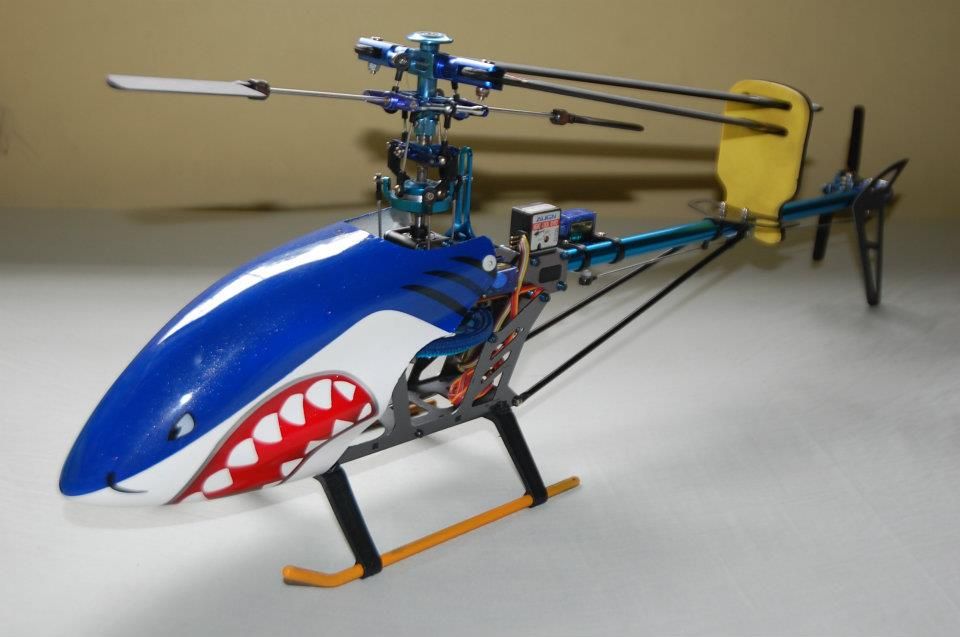
Here's a new project of mine that is not related to RC drifting but is also an RC.
It's an Evotech 450 Heli that came from a good friend of mine. He gave me an air frame with no electronics and I just got parts one at a time by trading and buying a few stuff from a local hobby shop. It's still a work in progress and needs a whole lot of fine tuning for it to fly properly. But at least I'm almost done setting it up...just needs a few more tweaks here and there.
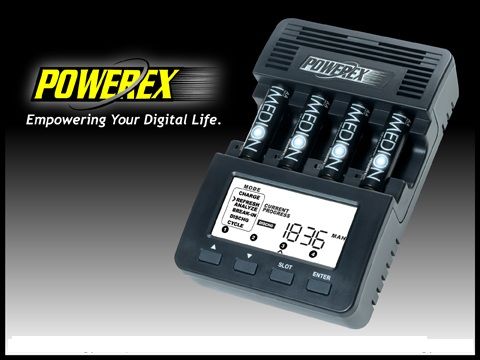
MH-C9000 WizardOne Battery Charger & Analyzer is suitable for the casual consumer users, enthusiast and professionals, WizardOne is capable of charging, conditioning, analyzing, cycling, forming and discharging one to four AA or AAA batteries, all while digitally displaying the battery capacity and voltage. All four slots can be operated independently in different modes and settings. Those seeing the unit for the first time will be struck by its large LCD screen, backlit by ultra-bright white LEDs. Measuring over 3.5" by 1.5", the display is more than three times larger than its closest competition and shows a wealth of information that is easy to read. In addition to the standard charging, conditioning and discharging, the WizardOne charger-analyzer also offers two unusual operations modes. The "Break-In" mode allows the user to input the capacity of the battery and performs a "forming" charge designed to properly break-in new batteries. The "Cycle" mode allows user to charge and discharge batteries consecutively while storing the capacity for up to 15 cycles. There are ten selectable charging and discharging current from 0.2A to 2.0A and 0.1A to 1.0A respectively. The charger also features four independent temperature sensors using Maha's latest temperature rise detection algorithm in addition to the usual peak temperature detection. It also armed with additional patented termination algorithms found in other Maha chargers. The unit can be operated in a "basic" and "advanced" mode. In the basic mode, user merely needs to insert the batteries with no further key press. The charger will select the appropriate settings automatically, making it suitable for the casual users.
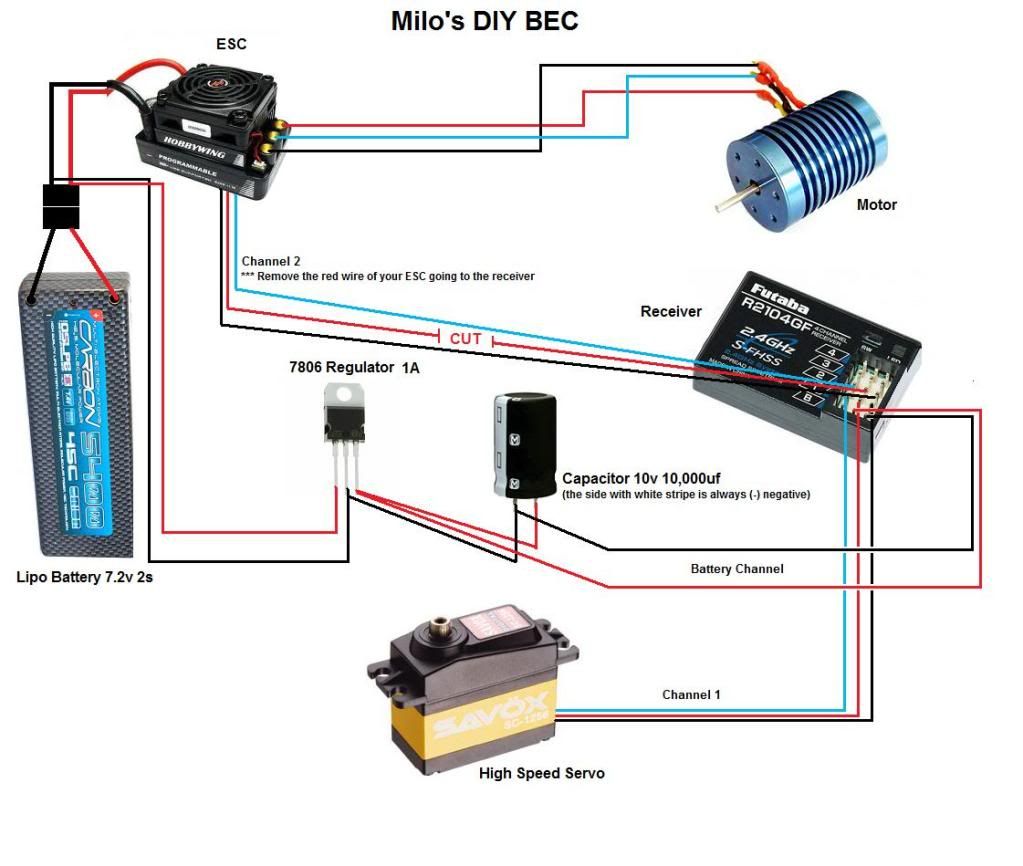
I just recently bought a Savox high speed servo SH 1290MG and replaced my Futaba S3003. I tried installing the servo normally and setup my transmitter but to my surprise when I try to steer to the left my kit is going full thottle even when I'm not touching the trigger just the steering wheel. At first the glitch was constant until I made some adjustments and it lessened just a little bit but I could clearly say it is still a problem.
1pc. capacitor 10v to 20v at 6800uF up to 10,000uF
1pc. regulator 7806 1A
1pc. servo connector (from your damaged servo or light kit)
soldering iron, lead and paste
some shrink tubing (for your wires, regulator and caps)
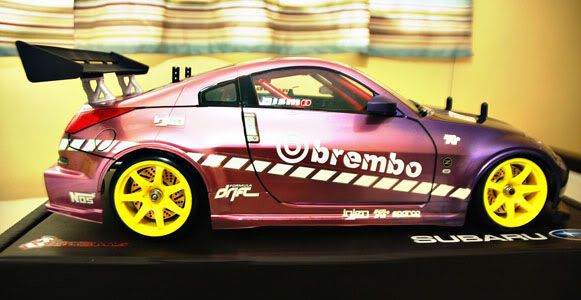
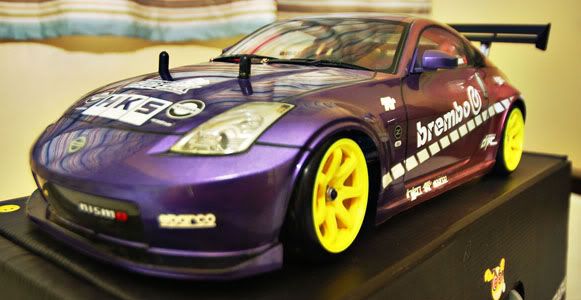
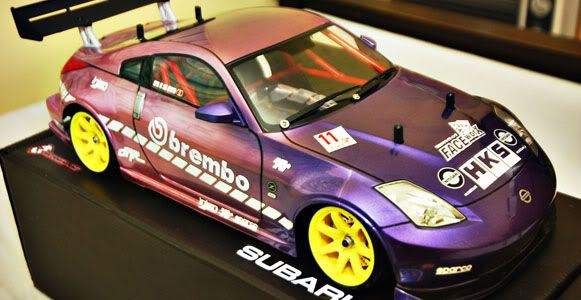
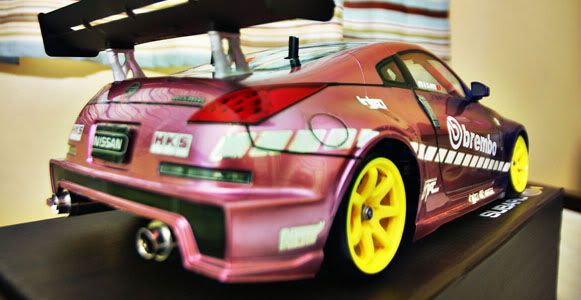
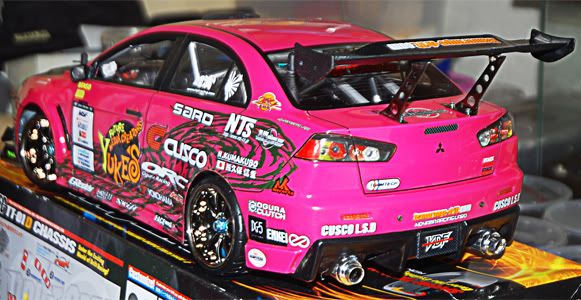
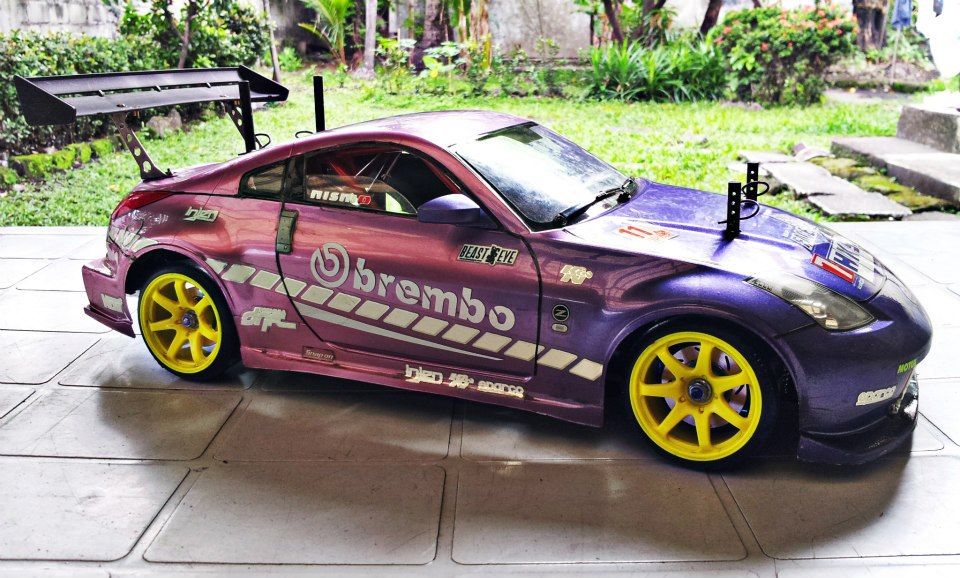
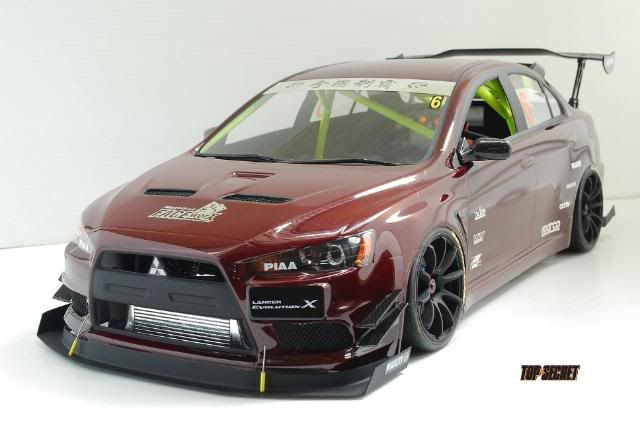
I got this used shell from a friend. I'm currently working on putting some details on it. Have removed some of the decals and replaced them with new ones. Fixed the body lines to give it a more realistic look and added a pair of mufflers, wipers, DIY roll cage and an HPI wing set. Also I applied a black backing paint to give it a more solid look. Here it is...
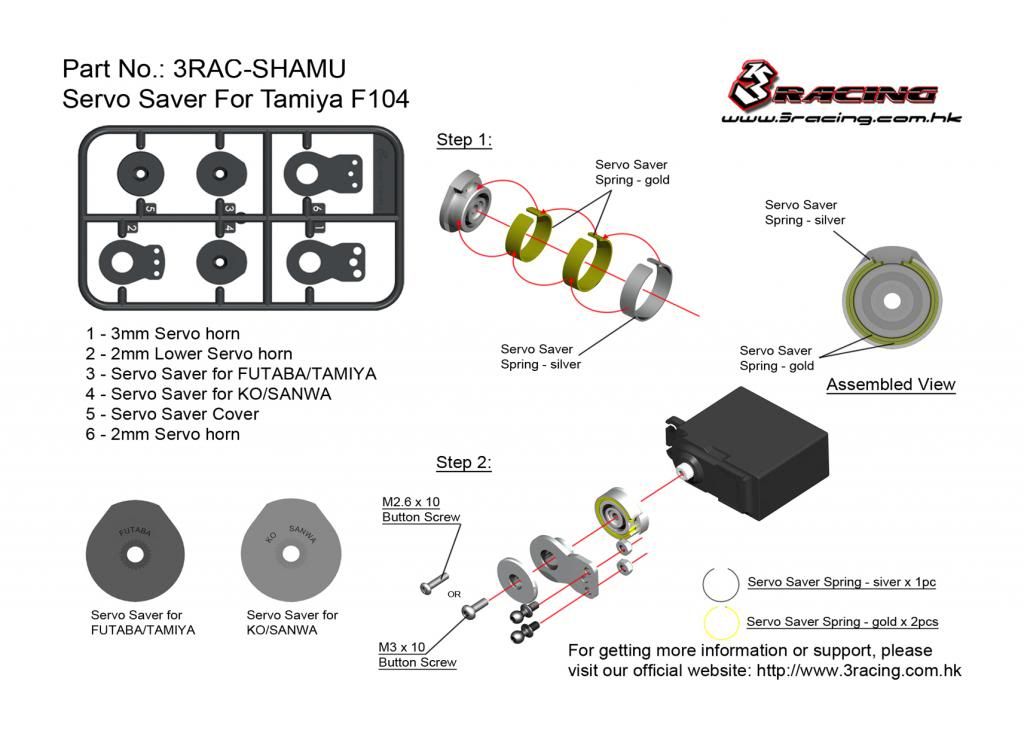
This is how to install a servo saver to your servo. Servo horns can be replaced or upgraded with other 3rd party aluminum servo horns. ***Always check for parts compatibility before buying any hop-up or upgrade parts.
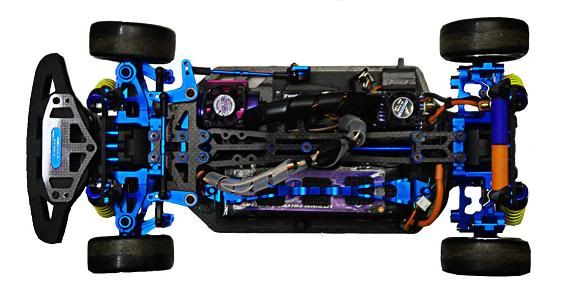
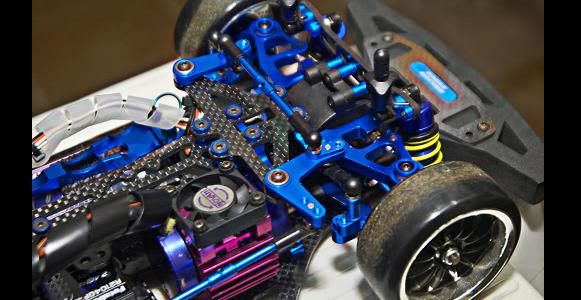
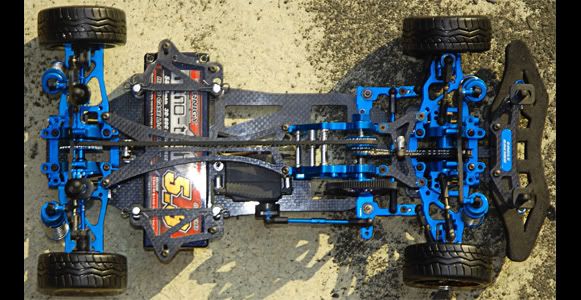
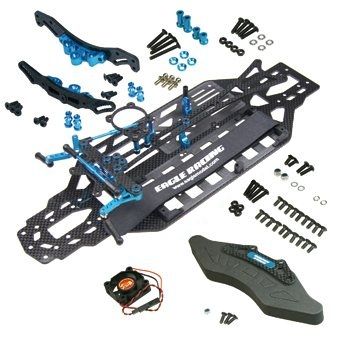
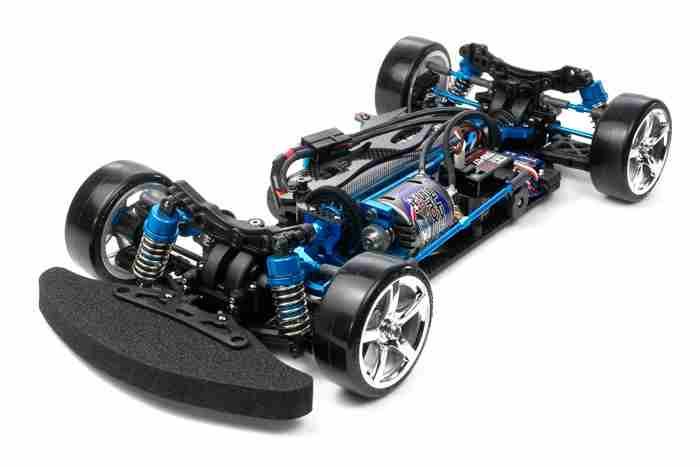
This is almost a complete kit all in itself just add those tiny parts like bearings and gears and you get yourself a running chassis. This conversion chassis is very easy to assemble even though the manual is written in I think Chinese you can clearly just follow the diagram in it. Actually you can build it without looking at the manual except for some small parts that I had to figure out what it's for and where it belongs. It actually comes factory assembled but of course you'd need to take it apart to install those parts that were not included in the kit.
Got this off a repost by sir tikoy from PRCD. Originally came from RC Car Action
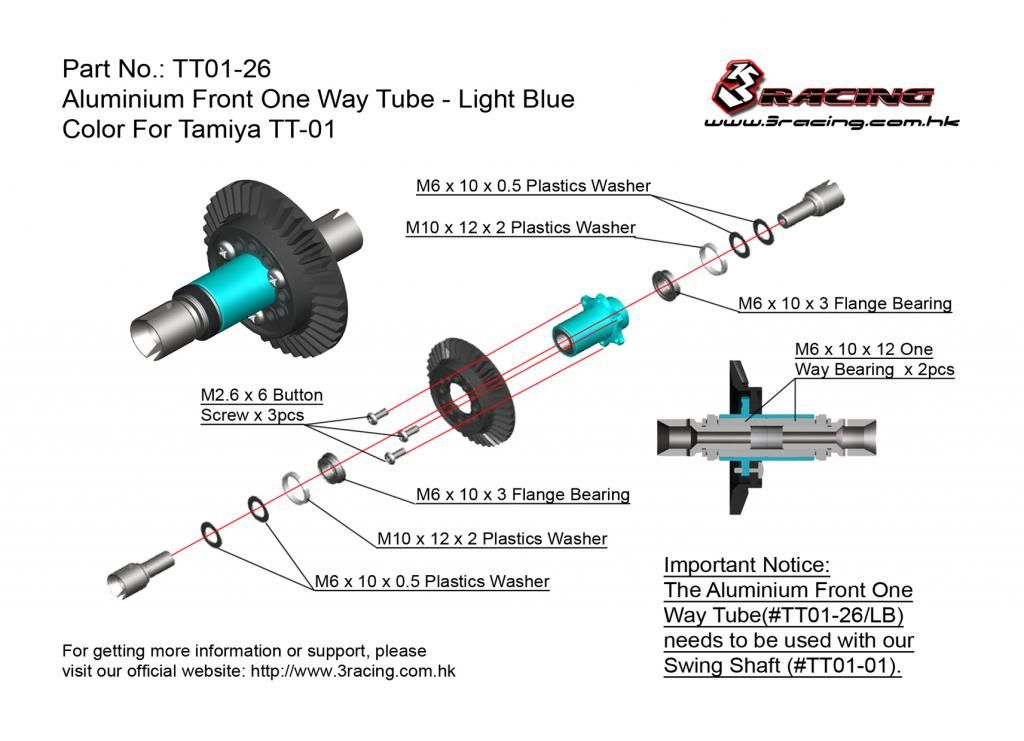
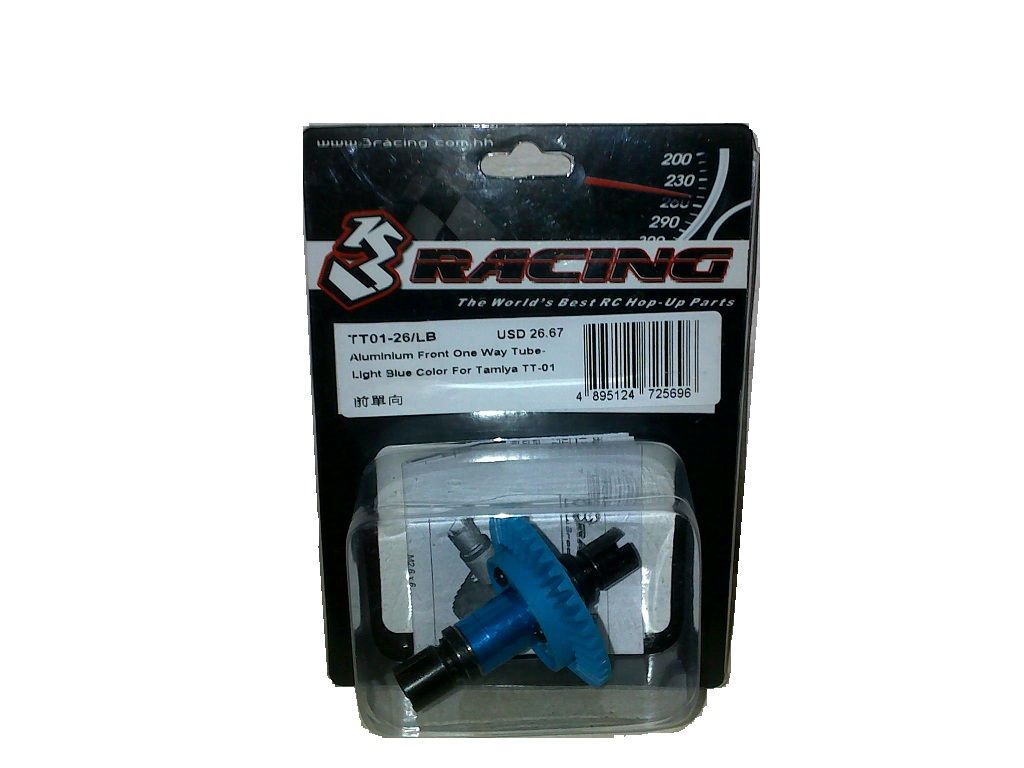
I find this very useful in understanding the importance of this upgrade from the standard differential
One-way bearings are still considered the "mystery" option in racing. We see them listed on the "Options" pages in kit instruction manuals, but how do they work? What do they do? And how will they affect your car's performance? There are several types of one-ways, and they can be installed in a variety of locations on the car. In this article, I explore the types of one-ways available and explain how they affect a car when it's racing.
Here are some of the tips I learned on how to properly setup your kit for drifting...just the basics. Am not sure if this would work with other kits as well but atleast this setup is done on my TT01D and it really improved the performance of my kit.
First I'll list down all the hop-up parts installed on my kit and after I'll list down all the settings and setup that was done on it. Just a checklist and a little how to guide.
I went to F48 earlier today and seeing all the pros play makes me damn nervous. Everybody was doing great and there I was smack right in the middle and everyone had to stop because my car was there stuck on the gutter. I was doing better playing outside the tracks hahaha but they insist for me to try and play on the track while the tourney is on break from the novice to the pro class.
I hitched a ride going to F48 with Elpaks and his son ABCDE upon reaching the place I saw familiar faces and was introduced to some of the friendly people whom I've met thru our forum (PRCD) sir Edongs, Maiki, Corics, Rixx, Jon, Arwin, Ize, Mang mags (JCMAGARU sorry don't know your real name bro) and a lot of other forum members. The place is great and I had a great time meeting the masters. Ize helped me out in setting up my TT-01 properly and I realized that most of the adjustments and setup that I made on my kit are mostly wrong. Tight joints and screws, dampers too stiff, ride height is too high and my wheel alignment was not properly setup also. After Ize made the final adjustments my shocks/dampers are now responsive, my steering is now faster and the angle became wider, Over steering is now lessened, Handling is now way better than before...thanks to this very nice fellow I learned a lot about setting up my own kit. Also thanks to JCMAGARU for letting me try his VDF on CS setup...all I can say is I'm not yet ready for CS period! On the way out I hitched a ride with Rixx going to pantranco so I can get a cab going home, thanks bro! Now I'm all hyped up to find my own drift track so I can pratice solo.
Calling all Tamiya TT01 variant owners. Am planning to put up a club exclusively for TT01 kit owners for possible projects and drift events. Please join us on our Facebook page TT-01 Drift Club Philippines
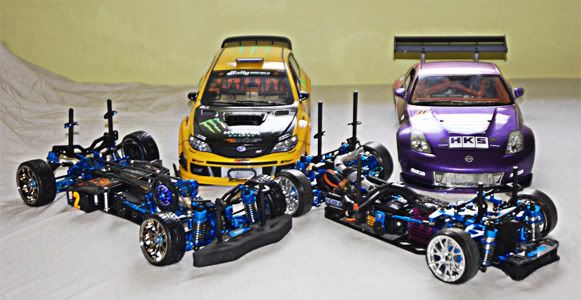
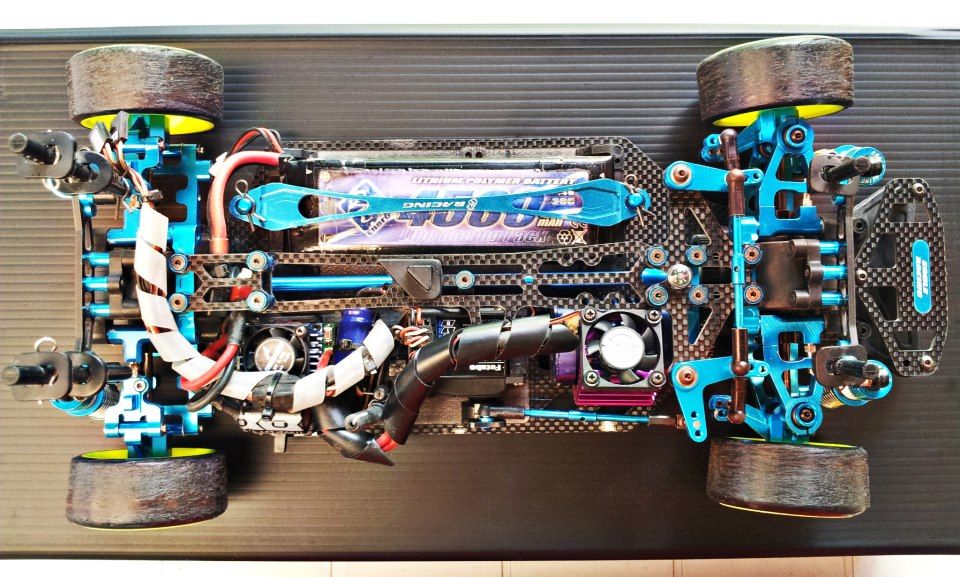
Would just like to share my experience on upgrading my Tamiya TT-01. I started out with the aluminum propeller shaft and CF upper deck and eventually I changed my drive shafts to universals and got myself a set of GPM adjustable suspension arms and alum hubs and knuckle arms to get rid of the wobbles, changed my steering set to a tamiya aluminum steering link and steering arms and installed a used TRF shocks/dampers with soft springs for better weight transfer. After all this upgrades I still could not drift properly for the life of me...actually nothing really changed in my kit except the way it looked and the steering angle that somehow became wider because of the GPM arms that I installed. Until recently I read something about locking the rear differentials in our forums so I searched for a video on youtube and started locking my rear diffs. No upgrades just gluing the rear differentials which cost me half a glue stick and walla! Drifting is now like 25% easier than before. I then asked around which is a better buy...a center one way or a front one way? Well COW is kinda hard to find locally so a FOW is a better alternative. Many say that a COW is a little tame and better for the unexperienced but again it's a rare item here in manila. So I searched our forums and found a used 3racing front one way from a private seller, I did not let a minute pass and offered a trade for the item and luckily we got ourselves a good deal. When I got home I immediately installed it and was too darn excited to try it out. All I can say is that the FOW is the most important/useful upgrade I ever got and it made me more confident to drift in a smaller area without hitting anything or banging the wall. If you wanna try out drifting I suggest you put this part on the top of your upgrade list. Now drifting is way way lot easier than when I started.
The Tamiya belt-driven TA05-VDF Drift Chassis Kit proved to be a huge success amongst R/C Drift enthusiasts. With the knowledge gained from the TA-05 VDF, Tamiya has developed the TB-03 VDS top-spec drift chassis kit which offers the direct response of a Shaft-Driven 4WD system.
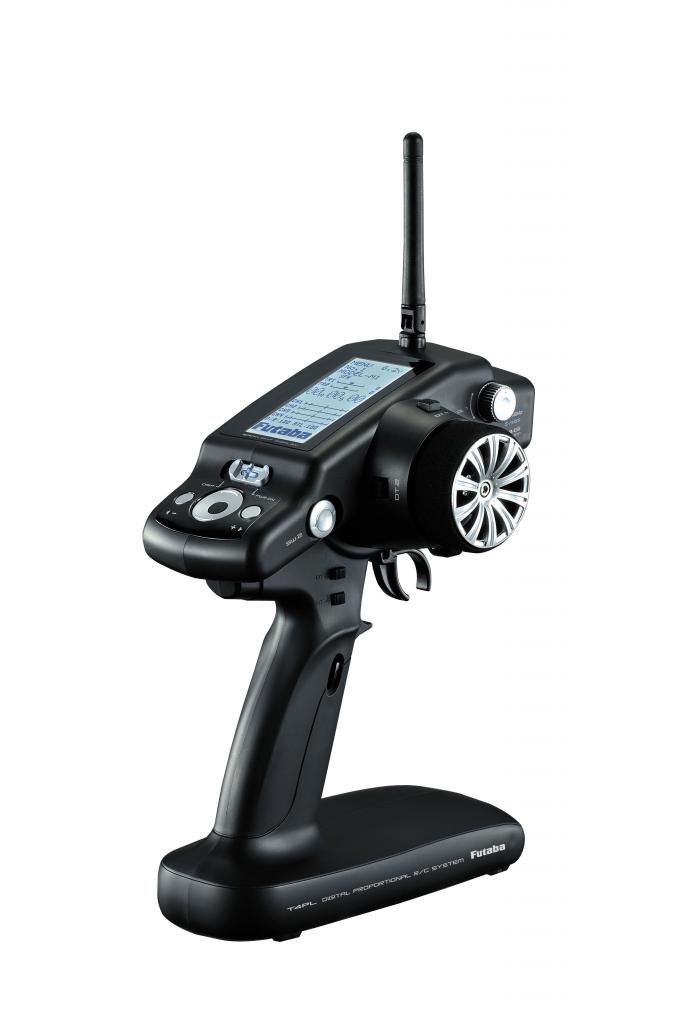
Just recently my wife gave me a Futaba 4pl for our 10th year anniversary. She's kinda complaining about the time I am spending on my hobbies but then again she still supports me on my activities. My first Tx was a Neo-link Razer 2 2.4Ghz which my wife also gave me as a monthsary present a few months ago and being the newbie that I am I kinda had the idea that it would do the job just like those expensive controllers out in the market...I was wrong hahaha. Futaba's 4pl was the very first Tx that got my attention because I loved the way it looked and specially the size having big hands I wanted something that is comfortable to hold. It's lightweight and built like a tank plus it almost has all the features as the 3pks, features that one would need for drifting. I kinda noticed a lot of sellers in our forums selling their 3pl, 3pm, 2pl, 3pk,m11, m11x and even their 4pk's but could not find one selling a 4pl...I figured maybe because they liked this Tx so much that nobody would want to sell theirs hahaha well this is just my theory. All I can say is I love it! It's Cheap compared to the 4pk and the m11x yet it looks classy and sophisticated and has everything you'd want in a radio!
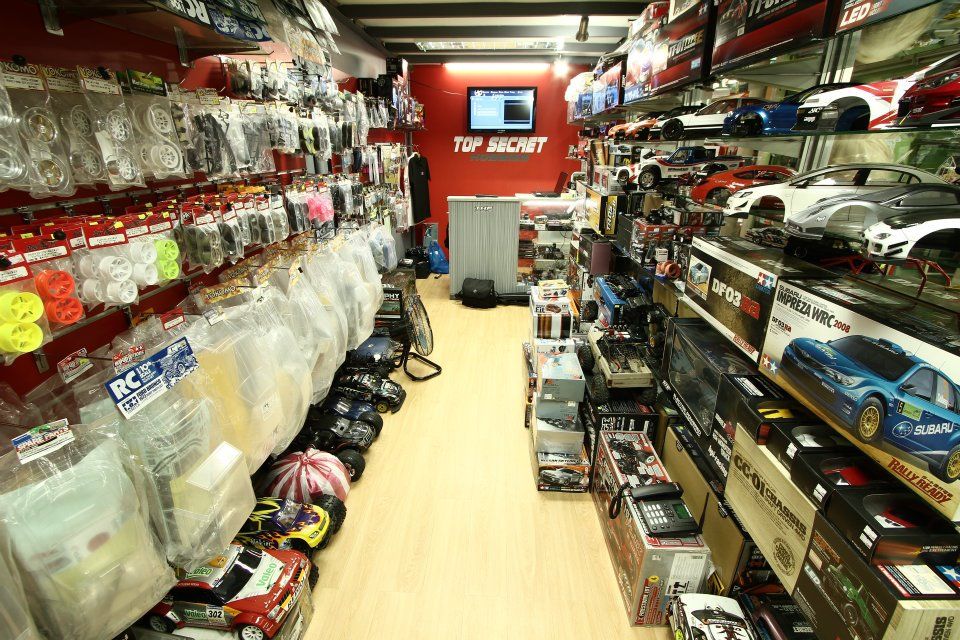
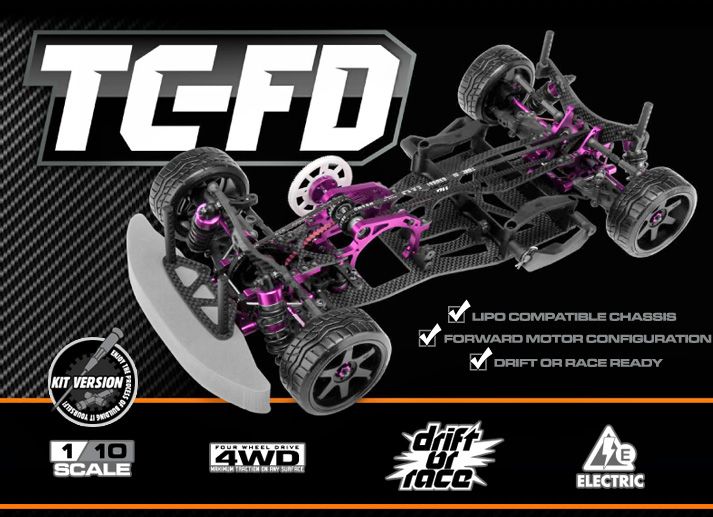
The HB TC-FD kit is now available in Action Hobbies in Eastwood Libis and in TOPSECRET Hobbies in shopsville plus in greenhills! The much awaited kit has finally landed in Manila. After well over a year in development the Hot Bodies TC-FD is here! It has been test-driven by multiple world champions to make it the fastest, most reliable and tunable machine on the track. It has been fully optimized for use with the most recent achievements in battery and motor technology. The Hot Bodies TC-FD is the latest evolution of the multiple winning HB TC Platform.
This is my DIY brake light that I made about 2 weeks ago. I used one of the small roof scoop included in the yokomo GT wing kit. It had 2 flaps where you should put the double sided tape to stick to your shell, I used it as the cover for the pair of 5mm red led lights and used a hot melt glue to attach it above the brace of my yokomo mufflers.
This blog is all about RC drifting specifically 1/10 electric powered RC drift cars. I started in this hobby early march of this year and have been learning the ins and outs of drifting and countersteering. I will be posting news, events, first hand gear reviews and setups, tips and tricks, DIYs, info on the premier tracks and stores around the metro and some of my latest projects and activities. I will share with you guys all the things that I know and will learn along the way. Hope you guys enjoy reading my posts and hope to see you all soon around the tracks!
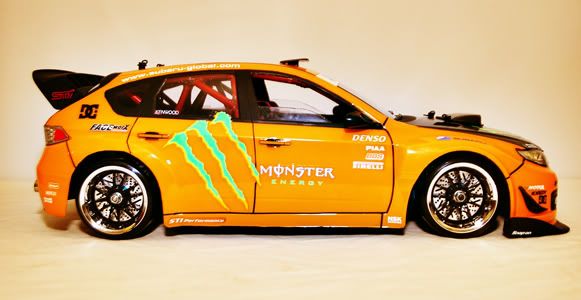
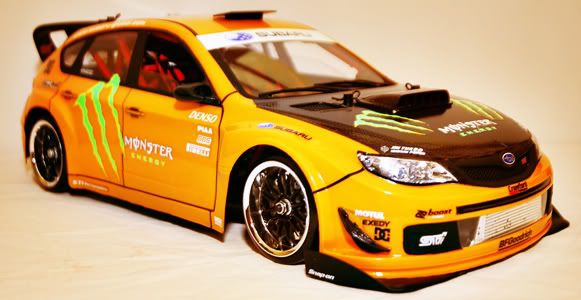
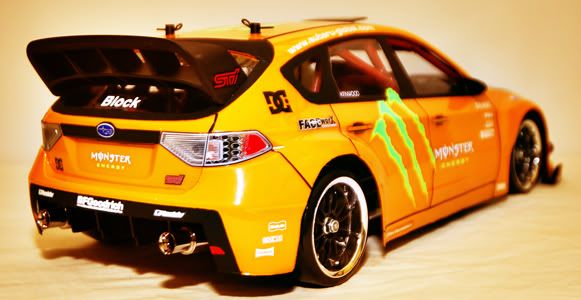
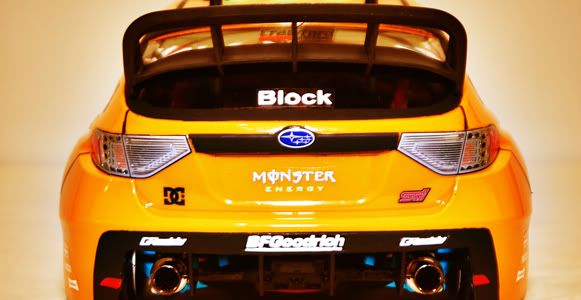
Here's the very first shell that I painted and designed. It's a Subaru Impreza WRC 2008 painted with tamiya camel yellow (PS-19) and added some yokomo dress up parts like mufflers, wipers, side mirrors, hood and roof scoops and canards. Did some DIY roll cage made from balloon sticks and a pair of recaro racing seats made from an empty chocolate spread jar. Still a work in progress.