


By: Sir Hector aka hgcolors

i want to share how i do the integrated undersplitter and side air splitters on the front end. things needed are: a small ruler, permanent pen, long nose and scissors.

try to make a small ruler first with a width of 1/2 inch......

place a hole 3/8 from one side........

cut the front end of your bodyshell without cutting the lexan part which
should look like this.........
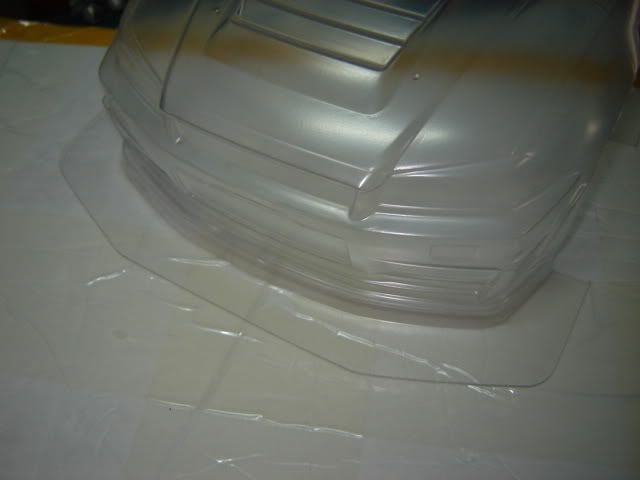
place your home made ruler, with the hole near the edge......

or with the hole the other way........

i chose to use where the undersplitter will be longer........
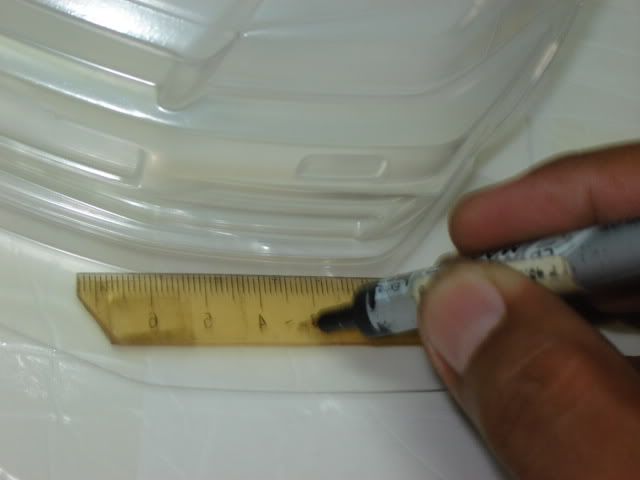
with your permanent marker pen in place in the hole, run the length
of the front end with the edge of the ruler against the lexan from left to right....
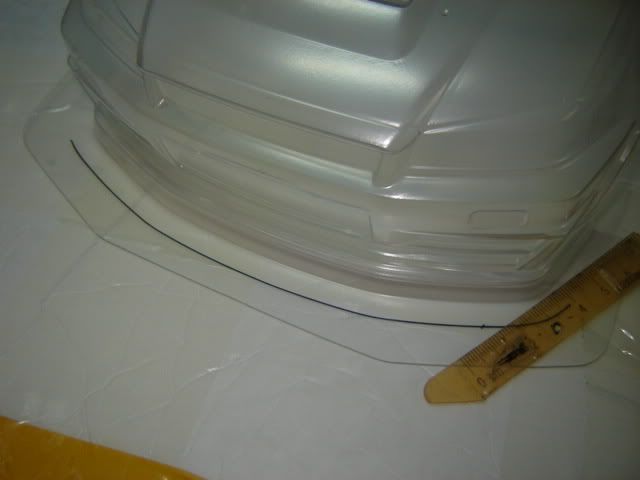
you'll now have a line that has the same contour as the front end and
try to finish the end lines with some curve lines that will be the shape
of the side air splitters..............
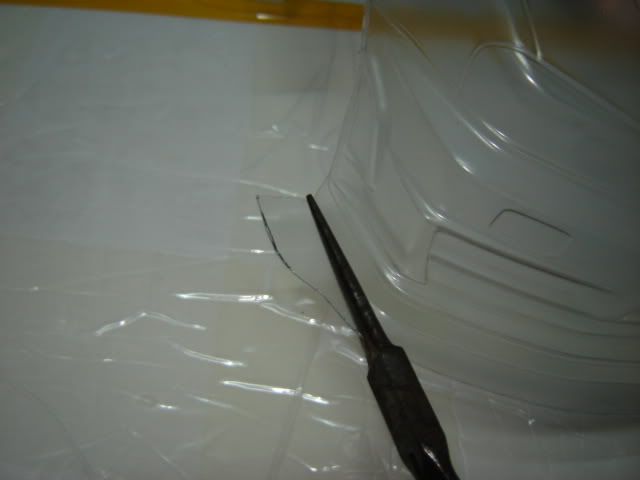
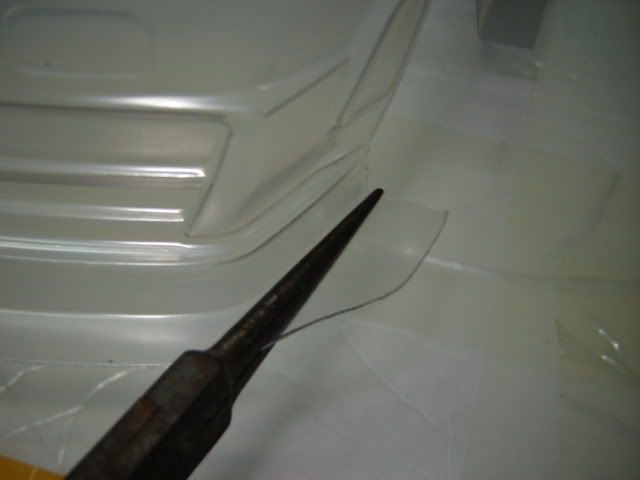
cut along the line, and now using the your long pliers, line it up till
you think it's perpendicular to the length of the bodyshell.........
fold the end, and should have something like this........

do the same with the other end....
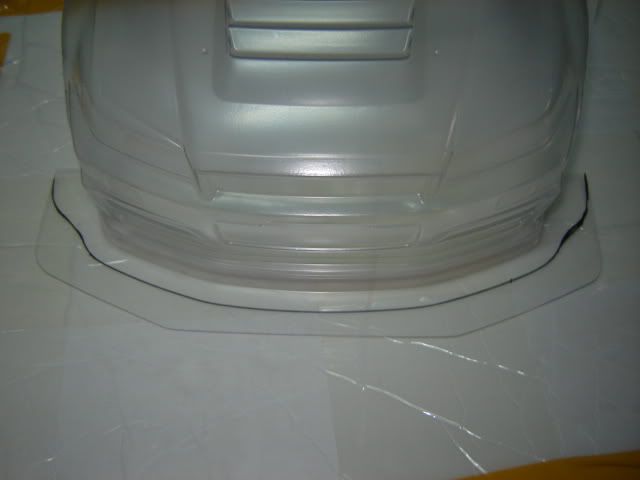
this is what it should look like....
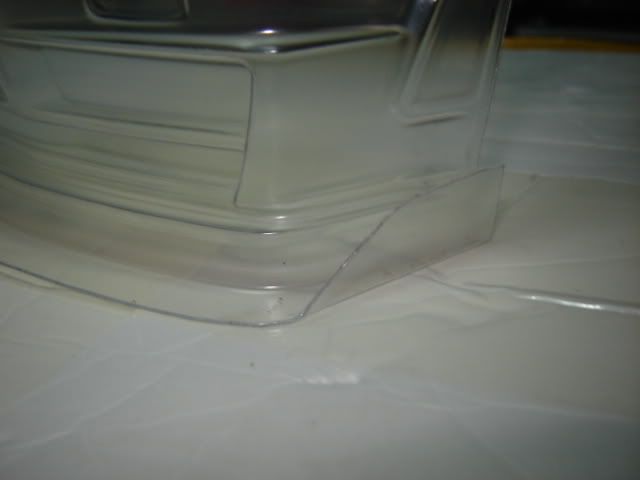
bend it some more till you get it at about 90 degree angle and this
should be close to this shot........front......

side............
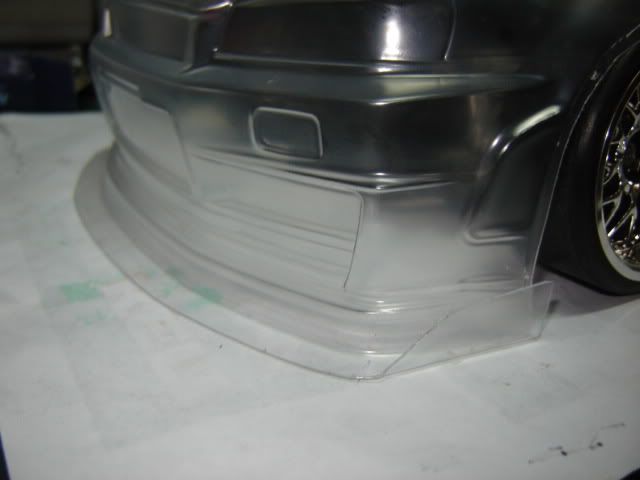
i hope you learned something from this easy way of how i do the front end
with the integrated undersplitter and side air splitters which i've been doing the past years.
thanks for looking.
place a hole 3/8 from one side........
cut the front end of your bodyshell without cutting the lexan part which
should look like this.........
place your home made ruler, with the hole near the edge......
or with the hole the other way........
i chose to use where the undersplitter will be longer........
with your permanent marker pen in place in the hole, run the length
of the front end with the edge of the ruler against the lexan from left to right....
you'll now have a line that has the same contour as the front end and
try to finish the end lines with some curve lines that will be the shape
of the side air splitters..............
cut along the line, and now using the your long pliers, line it up till
you think it's perpendicular to the length of the bodyshell.........
fold the end, and should have something like this........
do the same with the other end....
this is what it should look like....
bend it some more till you get it at about 90 degree angle and this
should be close to this shot........front......
side............
i hope you learned something from this easy way of how i do the front end
with the integrated undersplitter and side air splitters which i've been doing the past years.
thanks for looking.